Kombucha Brewing 101
November 30, 2018
Hobbypost during funemployment time! A few years ago I discovered Kombucha, a fizzy fermented probiotic drink, and got quite addicted. The good: it’s a healthy, low sugar, carbonated drink for you. The bad : $4-5/bottle makes it a pricey habit. PS, did anyone else die of cuteness at this scene in “To All The Boys I Loved Before”?

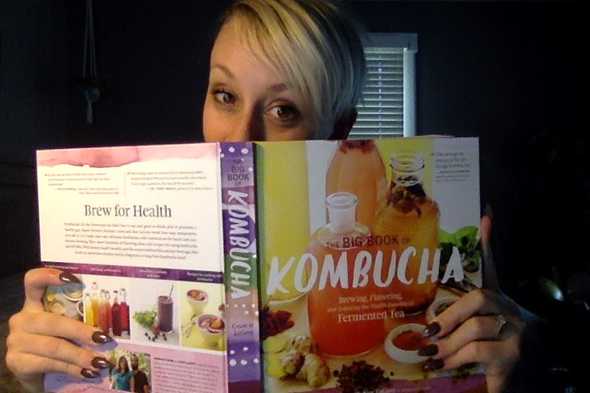
Fortunately brewing kombucha at home is fairly low cost, safe, and fun project to experiment with! So late this summer I began researching how to brew my own kombucha and went about acquiring the things I’d need - The Big Book of Kombucha, a brewing vessel, a cotton kitchen towel, green tea, and a SCOBY. That’s all it takes, folks! Though technically I didn’t have to buy the book, there’s plenty of info online, but I’m a sucker for hardcover cooking related books with pretty covers, and this one is just fun to read.
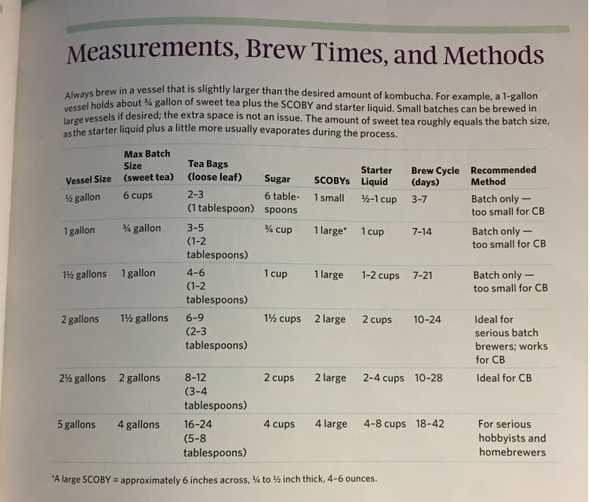
I was lucky that a friend, Lee, had been brewing previously and was looking to get rid of her SCOBY. It’s pretty easy to find a SCOBY from someone in your area vs. buying a dehydrated one online. Check craigslist, ask at local health food stores, or put out a request on social media! When you do procure one, make sure to get at least a few cups of starter liquid(liquid from the batch that SCOBY has lived in) depending on the batch size you want to start with. Here’s a handy brew table from The Big Book of Kobucha
Quick Terminology
- Kombucha: A tangy fermented beverage made by culturing sweetened tea with a culture called a SCOBY.
- Booch: Shorthand name for kombucha the cool kids use.
- SCOBY: A SCOBY is the starter culture used for fermenting sweet tea to create kombucha. Also referred to as a “mushroom” or a mother. SCOBY stands for Symbiotic Colony of Bacteria and Yeast.
- Pellicle: Another name for SCOBY, drawing from the idea that it’s a membrane separating the liquid from the outside air. I have had issues with my brew not fermenting until a new pellicle formed across the top of the container.
- 1F: Shorthand for 1st fermentation
- 2F: Shorthand for 2nd fermentation
- yeast: a microscopic fungus consisting of single oval cells that reproduce by budding, and are capable of converting sugar into alcohol and carbon dioxide. I mention yeast here because you may see strands of it in your brew, especially in relation to the temperature of the brew.
How I brew
After researching and spending way to much time in the Kombucha subreddit(FFS ITS NOT MOLD), I chose to do the continuous brew method, which means you’re constantly drawing off liquid from your main batch to flavor and bottle, then replacing the removed liquid. The advantages here are always available booch, not having to clean the container between batches, and an always partially fermented environment makes it hostile to icky stuff that could mess up a brand new batch.
I started with 2 gallons of water that I “boiled” in my instant pot, steeped green loose leaf tea in for 3 minutes, added 2 cups of white sugar, then strained the tea leaves out and left the now sweet-tea in the fridge to cool overnight. FYI, hot temperatures can kill your SCOBY. You don’t want to kill your SCOBY now do you? PS. mine is named Miss Price.
Once my tea had cooled, I added it to my 2.5 gallon brewing jar with 2 cups of starter liquid, and with very clean hands inserted Miss Price into her new home. I covered my brew with a light cotton kitchen towel, secured it with some twine, then flew to Australia for a 2 week adventure. Brewing booch is a great hobby for international speakers - you look forward to sampling your brew to see how it tastes when you get back from your trips! (FYI, I’ve since upgraded to a 5 gallon container, linked below)
Once I returned home and the liquid from my 1F tasted how I wanted(slightly tart, most the sweetness gone), I drew the liquid into 12 bottles to try my first flavors. This is called the 2F process - a second round of fermentation where you add flavor to your kombucha liquid, and if done right creates that magic carbonation. Out of the first flavors I tried (red bell pepper, peach juice, habanero simple syrup and peach juice, and raspberry), I had IMMEDIATE carbonation success using raspberry puree, which is my recommendation to use for your first attempt. I tried being clever and using fruit juices, but quickly stopped using them as they don’t work as well as fresh fruit. IMO the trickiest part of Kombucha brewing is getting that delightful fizzy effervescence during your 2nd fermentation.
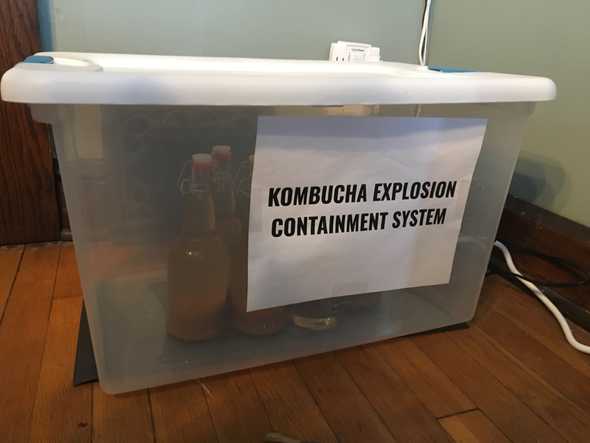
After much experimentation, research, and advice from fellow brewers on instagram, I pleased with my current 2F process. I puree my ingredients and add them to the bottles at about a 1:5 ratio. I let them sit in my Fermentation Explosion Containment system for 2 days with a temp of 65-75 degrees. After 2 days I strain the puree out, then rebottle and leave to ferment again for 3+ days. This method has resulted in fantastic fizziness without the fountain explosion!
RIP 1/2 my tasty Red Bell Pepper Booch …
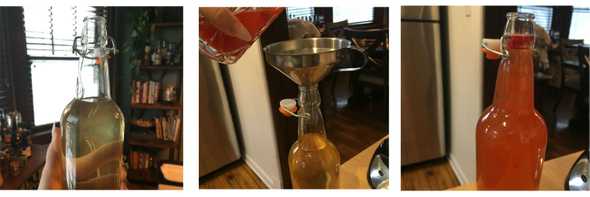
Bottle filling so you can see the amounts I use:
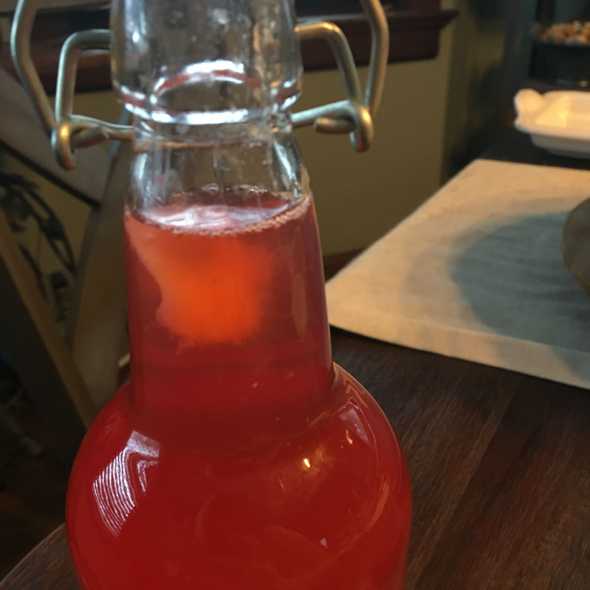
You’ll know you’ve done something right if you get a baby SCOBY in your bottles! And yes, they’re perfectly safe to drink, you probably won’t even notice it as you take a swig of dat tasty booch.
Look how cute that baby is! (Just wait, you’ll form an emotional attachment to SCOBYs too and excessively personify them.)
My brewing setup
- 5 Gallon beverage dispenser - buy here
- Simple cotton kitchen towel
- Seed heading mat(+ clear packaging tape) - buy here
- Thermometer stickers - buy here
- Grolsch style bottles - buy here
- Clear plastic tote for 2-3F processing.
- Metal funnel for filling bottles with puree
- Metal Strainer
Tips & Tricks
- Keep vessel out of direct sunlight, it’s not good for it.
- You don’t have to boil all your water to make the tea, you can go half & half. Boil half a gallon of water, steep your tea for the normal amount of time, then add half gallon of cold water.
- I’d recommend Raspberry puree for your first attempt at 2F
- Remove the metal from your bottles and wash them in your dishwasher using distilled white vinegar in place of dish detergent.
- If you notice no change in taste after several days(ie still tastes like sweet tea), check to see if the pellicle has formed all the way across the top of your vessel. If not, stir your brew with a very clean long spoon to mix things up. This happened to me once after adding new sweet tea and not stirring, meaning the new sweet tea with no cultures was resting at the top. Stirring things around started the pellicle forming that day.
- I like to prep and then freeze flavorings ahead of time. I’ll puree red bell peppers, pomegranate seeds, and leftover raspberries, then freeze in cubes and store for later.
- I love my temperature stickers and have a “control bottle” in my 2F box. It’s a bottle filled with just water with the temp sticker on it, so I know the temp my 2F bottles are fermenting at and can adjust my heat mat accordingly.
- Brewing your booch at a warmer temp will make it ferment faster, but create more yeast as a byproduct which can make your brew taste & smell too yeasty. If this happens, simply run your brew through a clean strainer and return it to it’s vessel.
- Your brew is safe to drink at any time. Unless there’s a tornado, in which case I recommend carefully taking your brew to a safe location to protect. #priorities. But seriously, I draw a little taste of mine every other day just to see how fermented it is. As soon as you like the flavor, it’s 2F time!
