Onboard Your Team Faster With Custom Snippets!
Custom code snippets are a great way to quickly onboard new team members and help them navigate your reusable components better cause my snippets bring all the boys to the yard.
April 11, 2019
Onboarding new team members can be rough, especially when you don’t have the perfect greenfield codebase and developers hate reading documentation almost as much as they hate root canals. A great way to help your team do things your way is by creating code snippets for them to easily use already created components instead of recreating the wheel. When they start to build a piece of ui, encourage them to use the snippets to see if the component already exists - thanks to the handy extensions you’ve built for their editor cause you’re so awesome!
Our Fake Codebase
We have some seriously awesome designers who’ve created brilliant reusable elements with sparkly css animations for us, cause goodness knows we don’t have the patience to perfectly style that button for ie8. To make it easy as cake to use these custom components, we’re going to create snippets that will generate the code we need when we start typing our app prefix “milkshake”. It’ll make things much easier for developers new to our codebase to see what components are available vs. digging through the codebase or reading the docs that we’ve probably gotten lax about updating. merp.
You can check out the project below, it’s a silly Angular 7 app, and my prefixes in the code samples will probably make more sense after looking at the components in the repo:
https://stackblitz.com/edit/github-5cph13
Our Reusable Components + Functions
Button
This button sparkles. What more could you want?

<milkshake-button text="holla"></milkshake-button>Input
This input lights up with a rainbow glow because it’s so excited to get a value from the user.
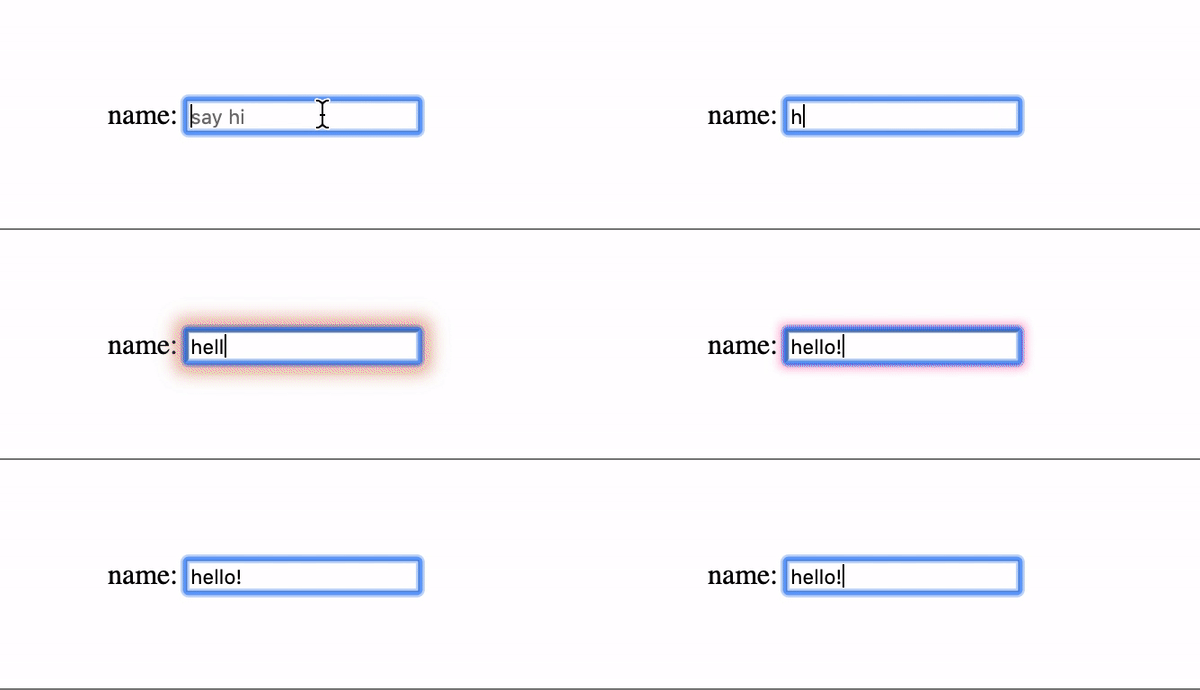
<milkshake-input formInputName="name"
  placeholderText="say hi"></milkshake-input>
Tabs
Tabs are way more fun when they sparkle. Obvi.
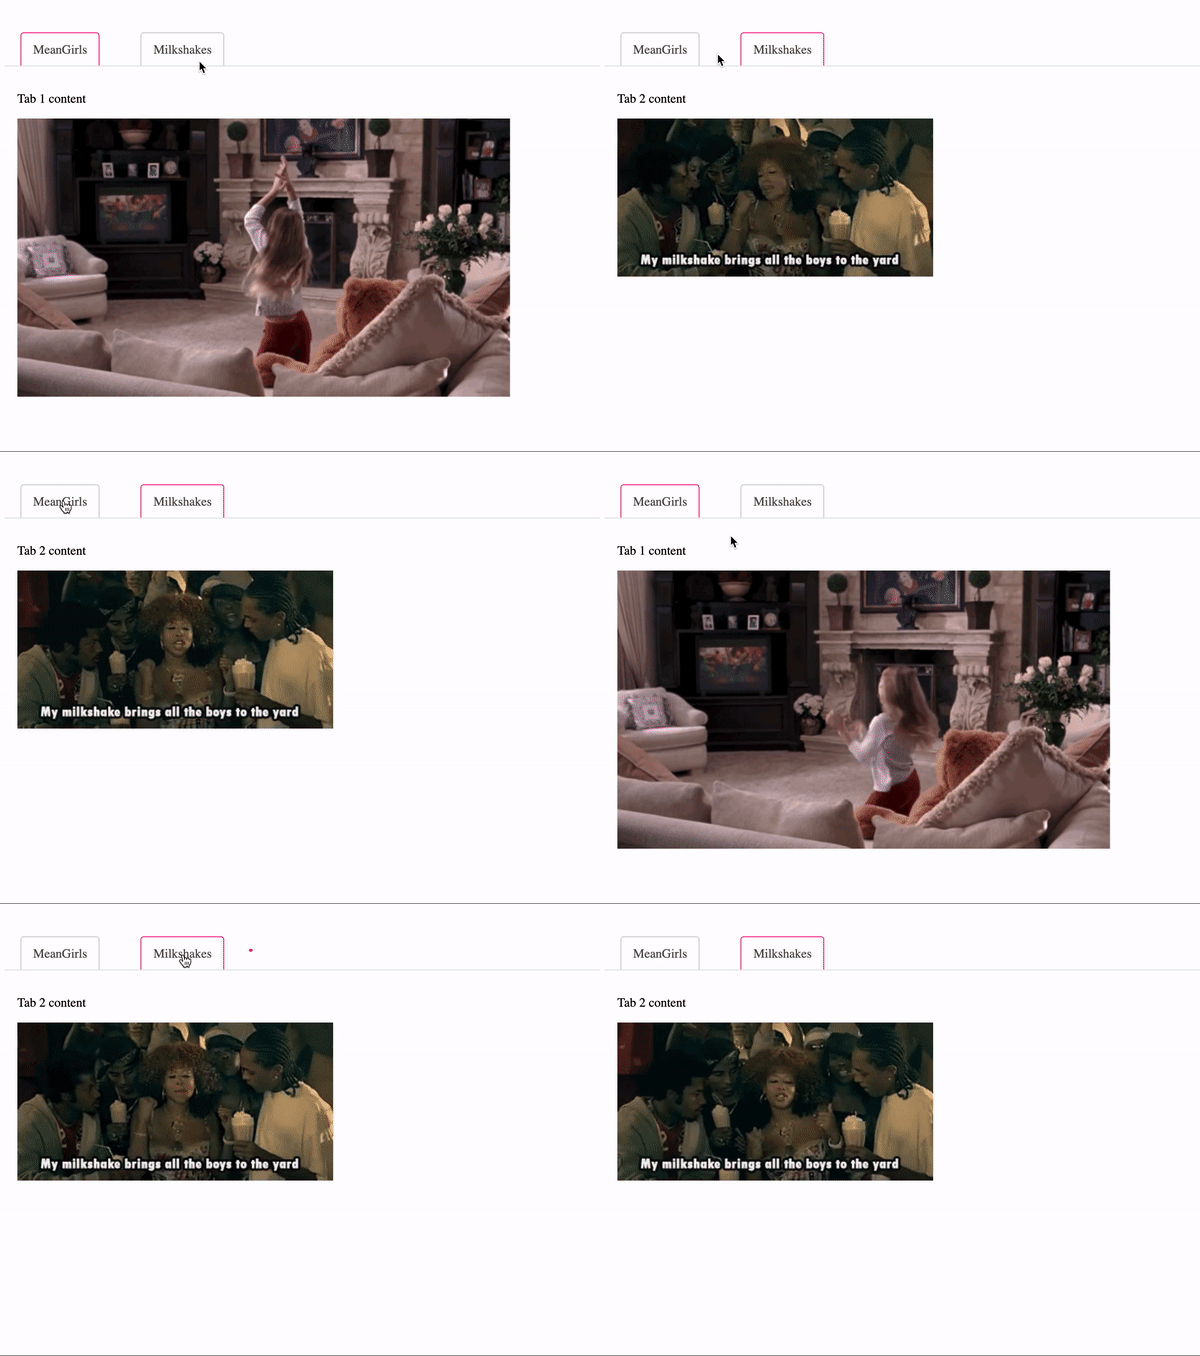
<milkshake-tabs>
  <tab tabTitle="MeanGirls">
    <p>Tab 1 content</p>
    <img src="../assets/img/meangirls.gif" />
  </tab>
  <tab tabTitle="Milkshakes">
    <p>Tab 2 content</p>
    <img src="../assets/img/milkshake.gif" />
  </tab>
</milkshake-tabs>
isSparkle class
For all the times we need to add some sparkle to our app, this snippet will set an isSparkle member to true temporarily for animation glory.
this.isSparkling = true;
setTimeout(() => {
  this.isSparkling = false;
}, 350);
Creating VS Code Snippets
VS Code is my primary editor, so I’ll start creating my snippets for that. First, let’s look at the schema of the basics for creating snippets:
{
  "Print to console": { (1)
		"scope": "javascript,typescript", (2)
		"prefix": "milkshake", (3)
		"body": [ (4)
			"console.log('$1 is super cool');", (5)
			"$2"
		],
		"description": "Log output to console" (7)
	}
}
(1) - the name of your snippet (2) - what file types you want your snippet to be available in (3) - what you need to type to be able to select your snippet (4) - the code that your snippet will generate (5) - the $1 is a variable space where the cursor will go on tab completion. these are called tabspots (6) - you can tab through as many variables as you want (7) - a longer description describing the what the snippet does
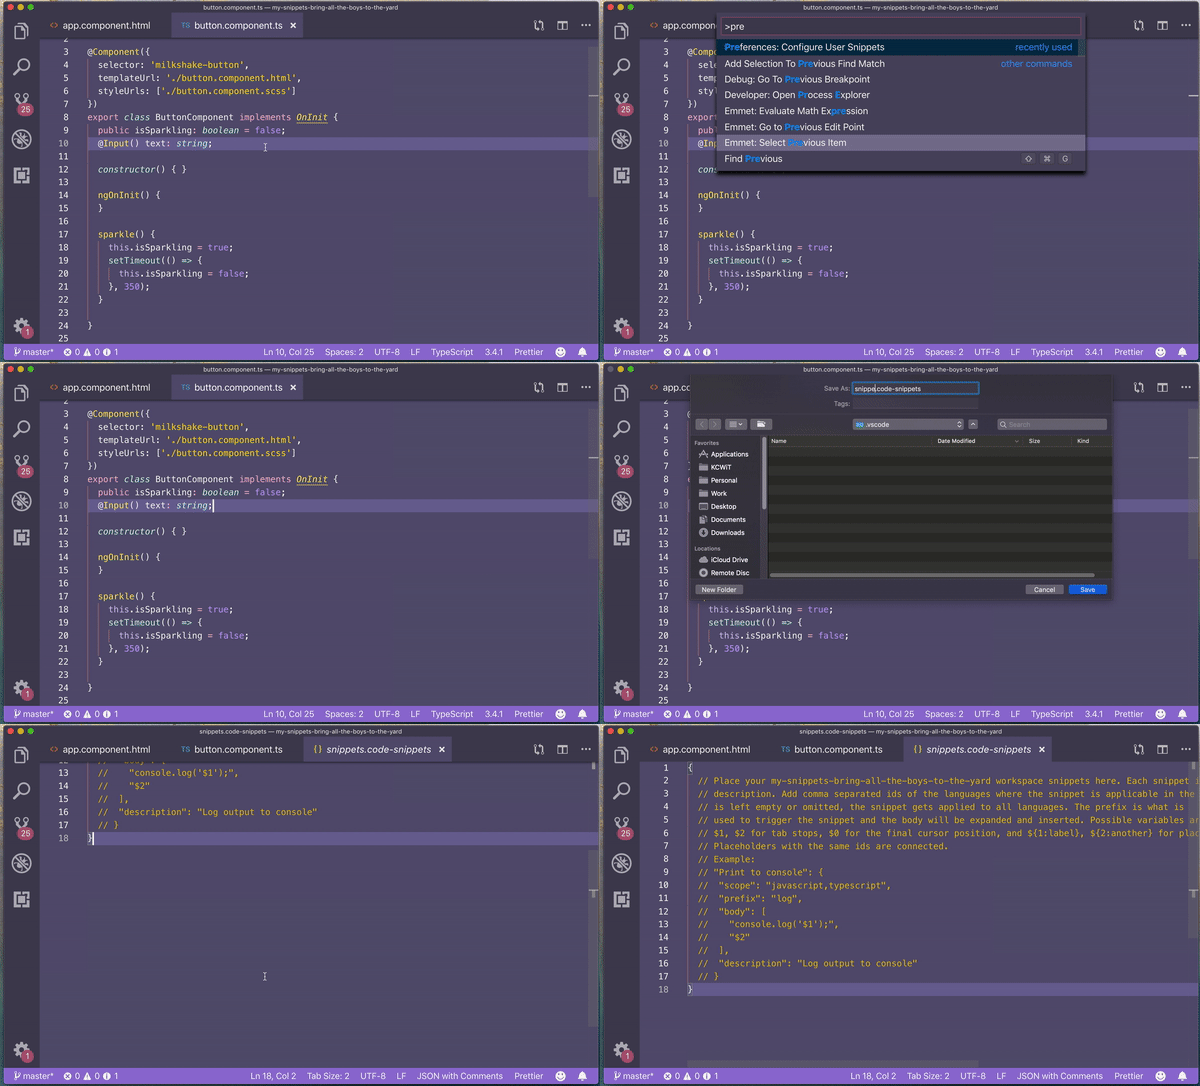
Now, let’s create a new snippets file for our project cmd + shift + p will open the command palate - search for Preference: Configure User Snippets. Select New Snippets file for {{project name}}, give the file a name “custom snippets”, this will create a new file for you with example code!
Button snippet
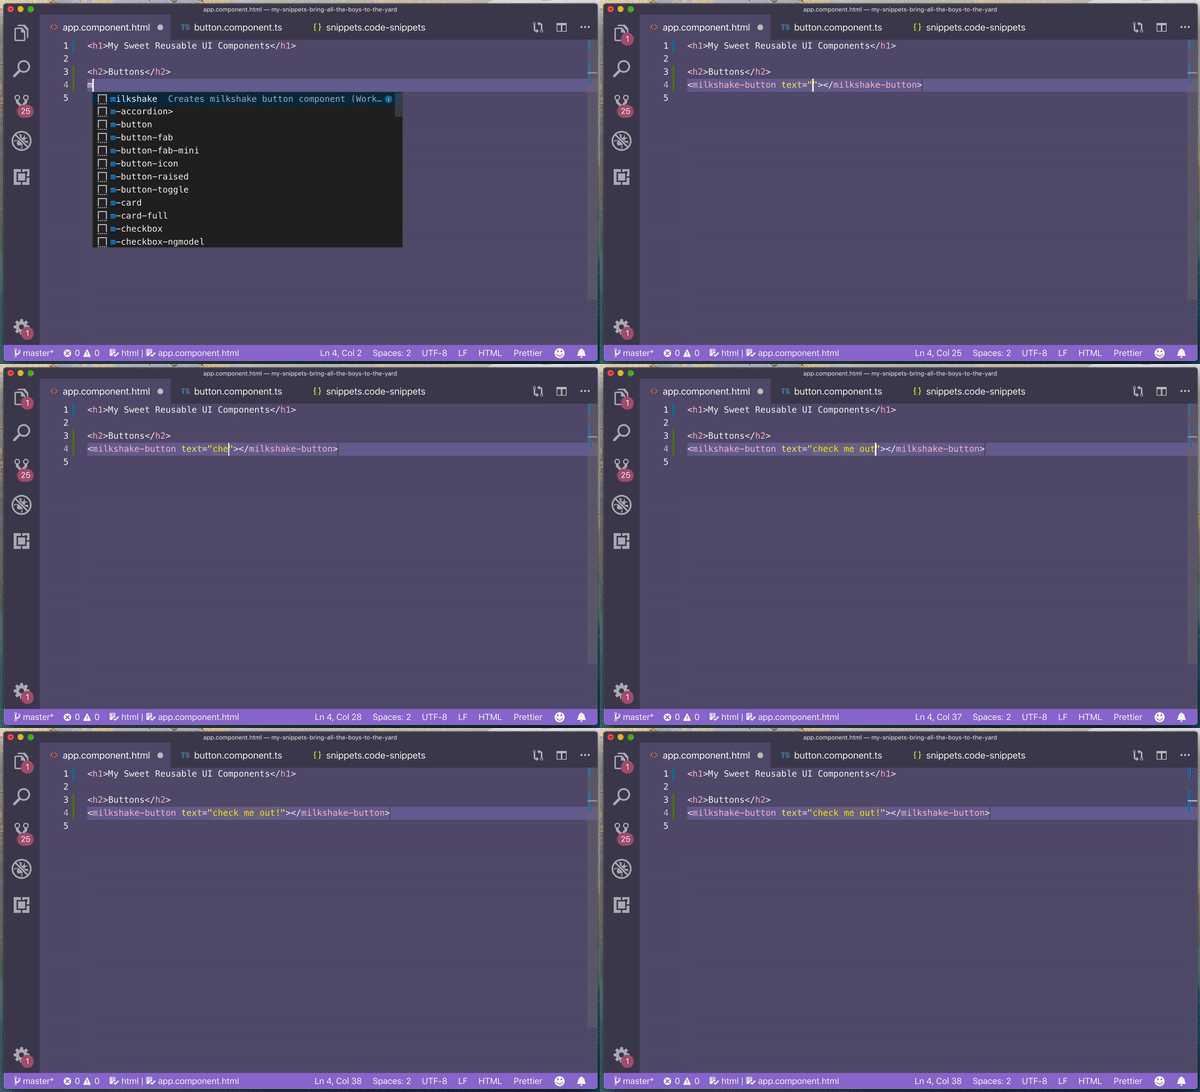
Let’s create a snippet for our button first. This one is pretty basic, there’s the component directive and an attribute that takes the button text content. We’ll use the tabstop to make it easy for our user to set the text attribute content.
{
  "Milkshake button": {
		"scope": "html",
		"prefix": "milkshake",
		"body": [
			"<milkshake-button text=\"$1\"></milkshake-button>"
		],
		"description": "Creates milkshake button component"
	}
}
When we save our snippets file, we’ll be able to use this snippet in our editor! Woooo! I think that our team’s love for us will be directly proportional to the number of keystrokes we save them.
Input Snippet
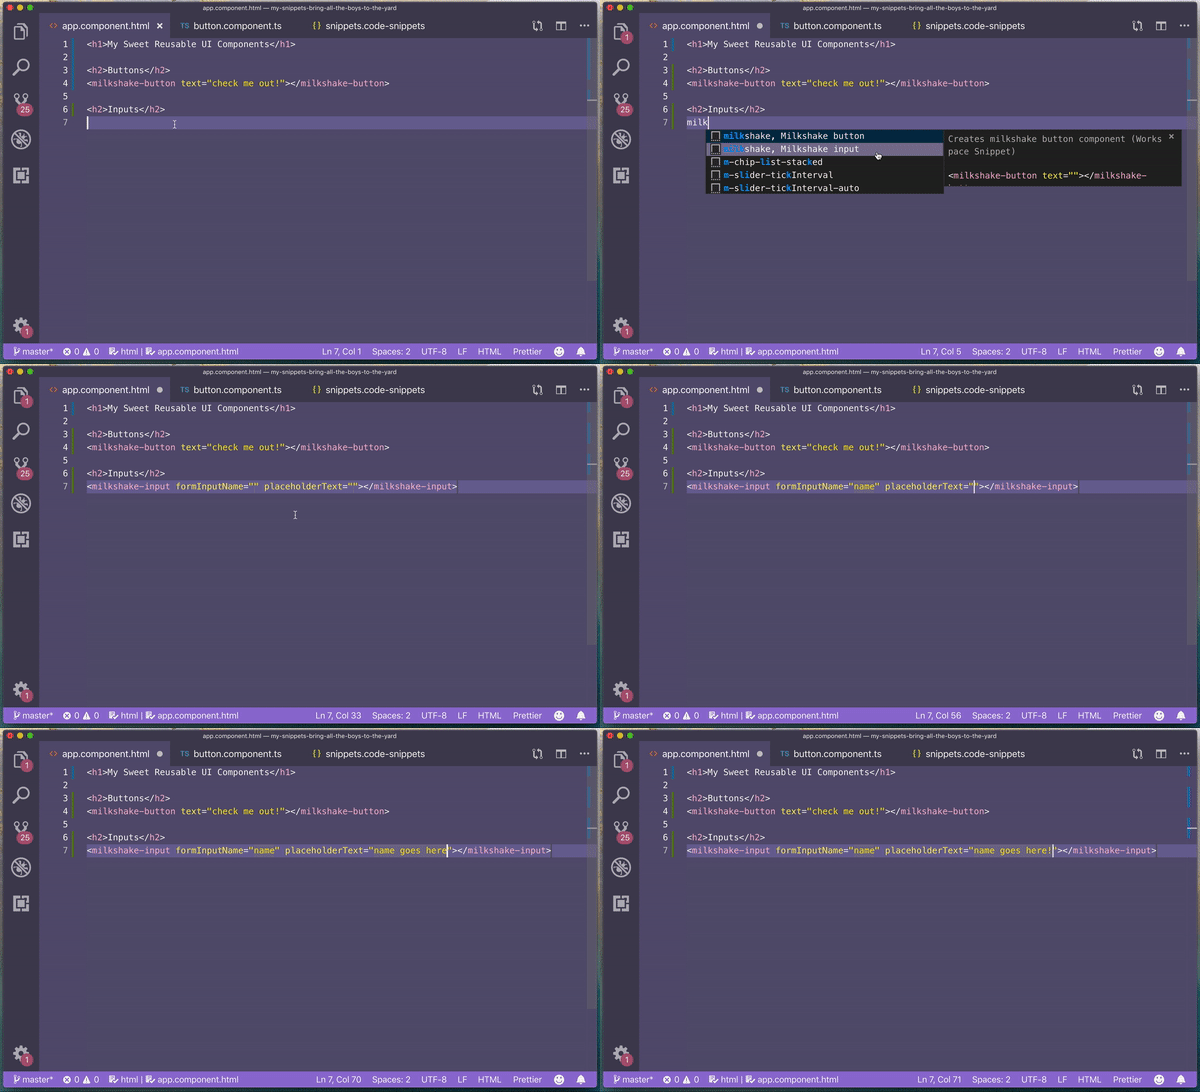
Next we’ll create the snippet for our input. This input has two inputs, so we’ll use 2 tabstops to help navigate those.
{
  "Milkshake input": {
		"scope": "html",
		"prefix": "milkshake",
		"body": [
			"<milkshake-input formInputName=\"$1\" placeholderText=\"$2\"></milkshake-input>"
		],
		"description": "Creates milkshake input component"
	},
}
Now when we go to use our snippet, we’ll see two different listed when we type “milkshake”. We can also click the info button to see more information.
Tabs Snippet
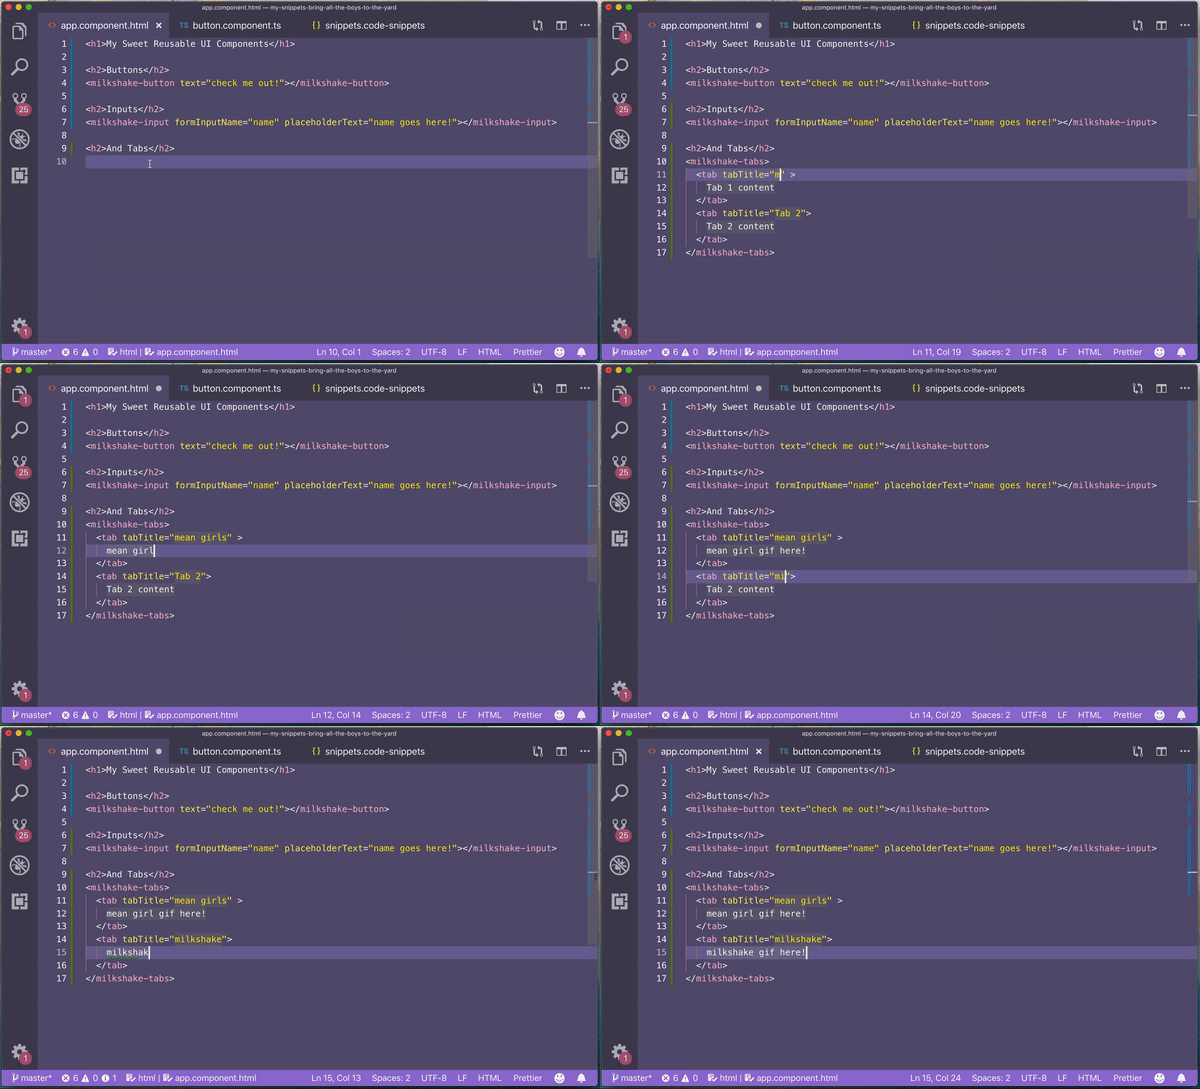
So far our snippets have been quick one-liners. Let’s look at making a multi line snippet with indentation. We use commas to differentiate new lines and can use tabs inside our strings to create indenting we need. I’ll also use placeholders ${1:Tab 1} where my tabstops are to give the user a little extra clarity on how the tabs should work.
{
	"Milkshake tabs": {
		"scope": "html",
		"prefix": "milkshake",
		"body": [
			"<milkshake-tabs>",
			"	<tab tabTitle=\"${1:Tab 1}\" >",
			"		${2:Tab 1 content}",
			"	</tab>",
			"	<tab tabTitle=\"${3:Tab 2}\">",
			"		${4:Tab 2 content}",
			"	</tab>",
			"</milkshake-tabs>"
		],
		"description": "Creates milkshake tabs component"
	}
}
Damn, girl, that’s some sweet tab action!
Sparkle Class
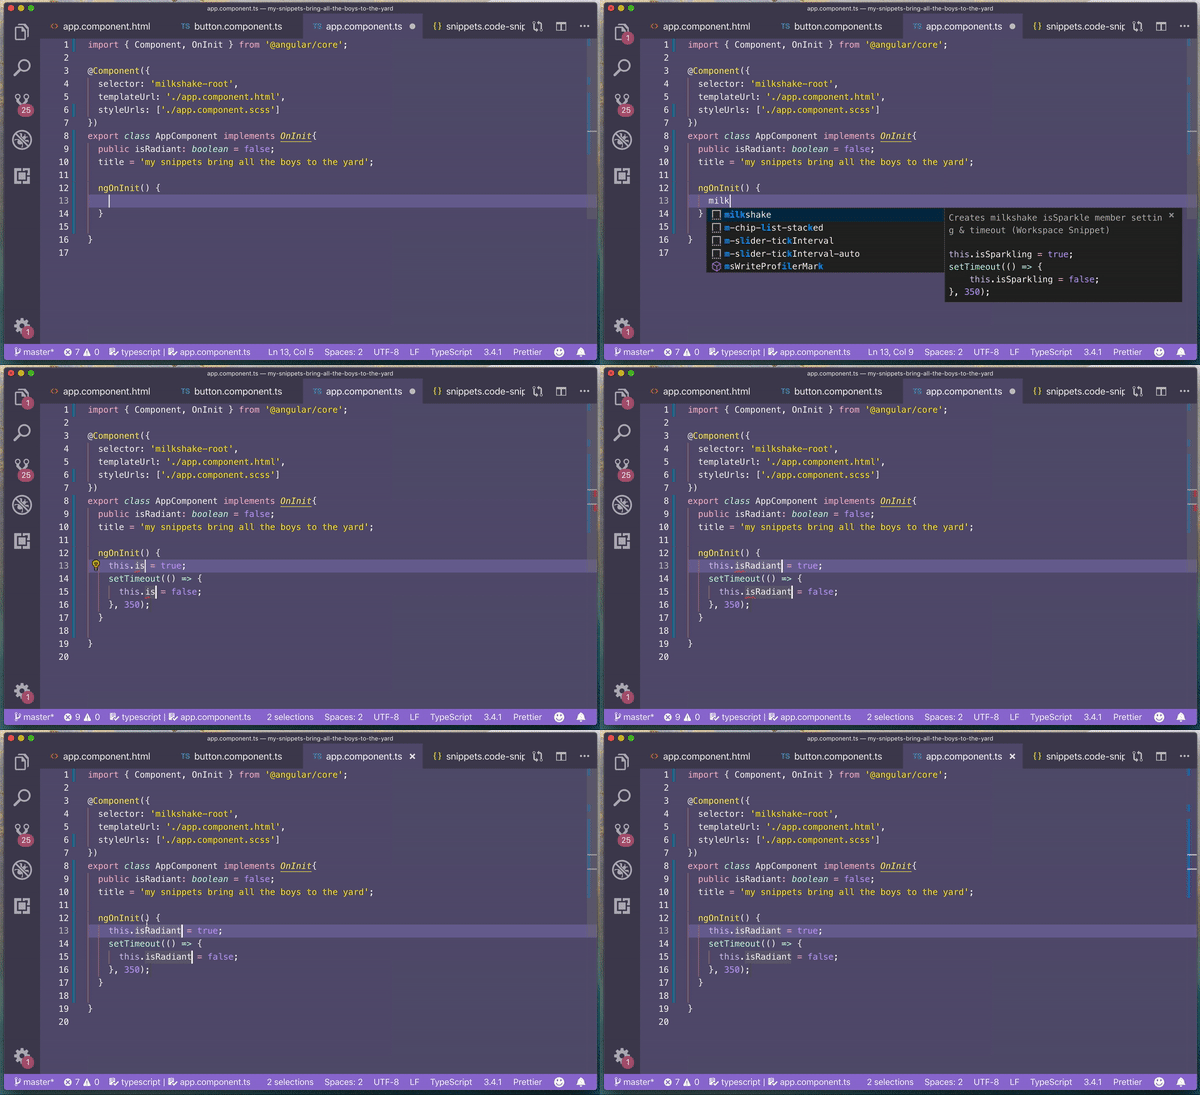
After a few times of implementing my sparkle class setTimeout pattern, I decided to put it in a snippet. For this one, I’ll set the scope to be ‘javascript, typescript’ so my snippet will only be available in JavaScript or TypeScript files. I’ll also use placeholders at my tabstops again to let the user set their own member.
{
	"Milkshake sparkleClass": {
		"scope": "javascript, typescript",
		"prefix": "milkshake",
		"body": [
			"this.${1:isSparkling} = true;",
			"setTimeout(() => {",
			"	this.${1:isSparkling} = false;",
			"}, 350);"
		],
		"description": "Creates milkshake isSparkle member setting & timeout"
	}
}
Sharing VS Code Custom Snippets with your Team
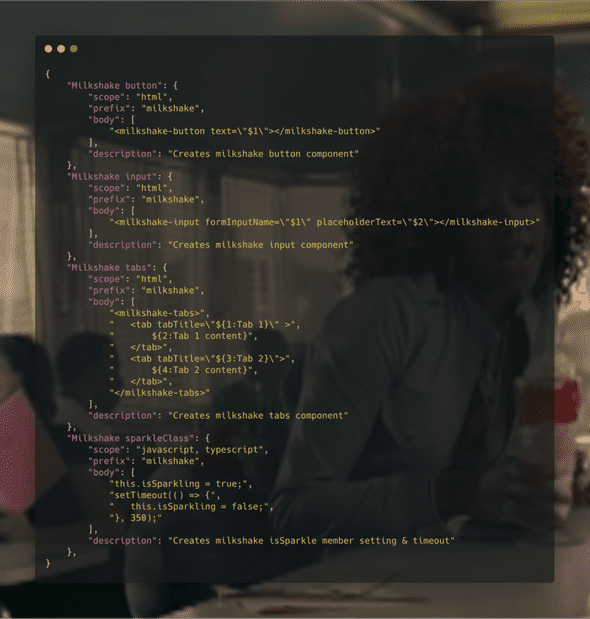
My finished snippets file looks something like this:
I can now commit this file to the app repo and it’ll be available for any other developers using VS Code.
Atom
I’ll move on to Atom snippets next. The schema looks fairly similar, but uses CSON - CoffeeScript Object Notation.
'.source.ts': (1)
  'Print to console': (2)
    'prefix': 'milkshake' (3)
    'body': 'console.log(${1:"crash"});' (4) (5)
		'description': 'creates a console.log statement' (6)
(1) - what file types you want your snippet to be available in (2) - the name of your snippet (3) - what you need to type to be able to select your snippet (4) - the code that your snippet will generate (5) - we’ve got tabspots here too! (6) - a longer description describing the what the snippet does
We can create a snippets file by selecting atom > preferences > snippets. Be aware that this will create a LOCAL file in your user’s atom directory, but is a good place to test creating your snippets.
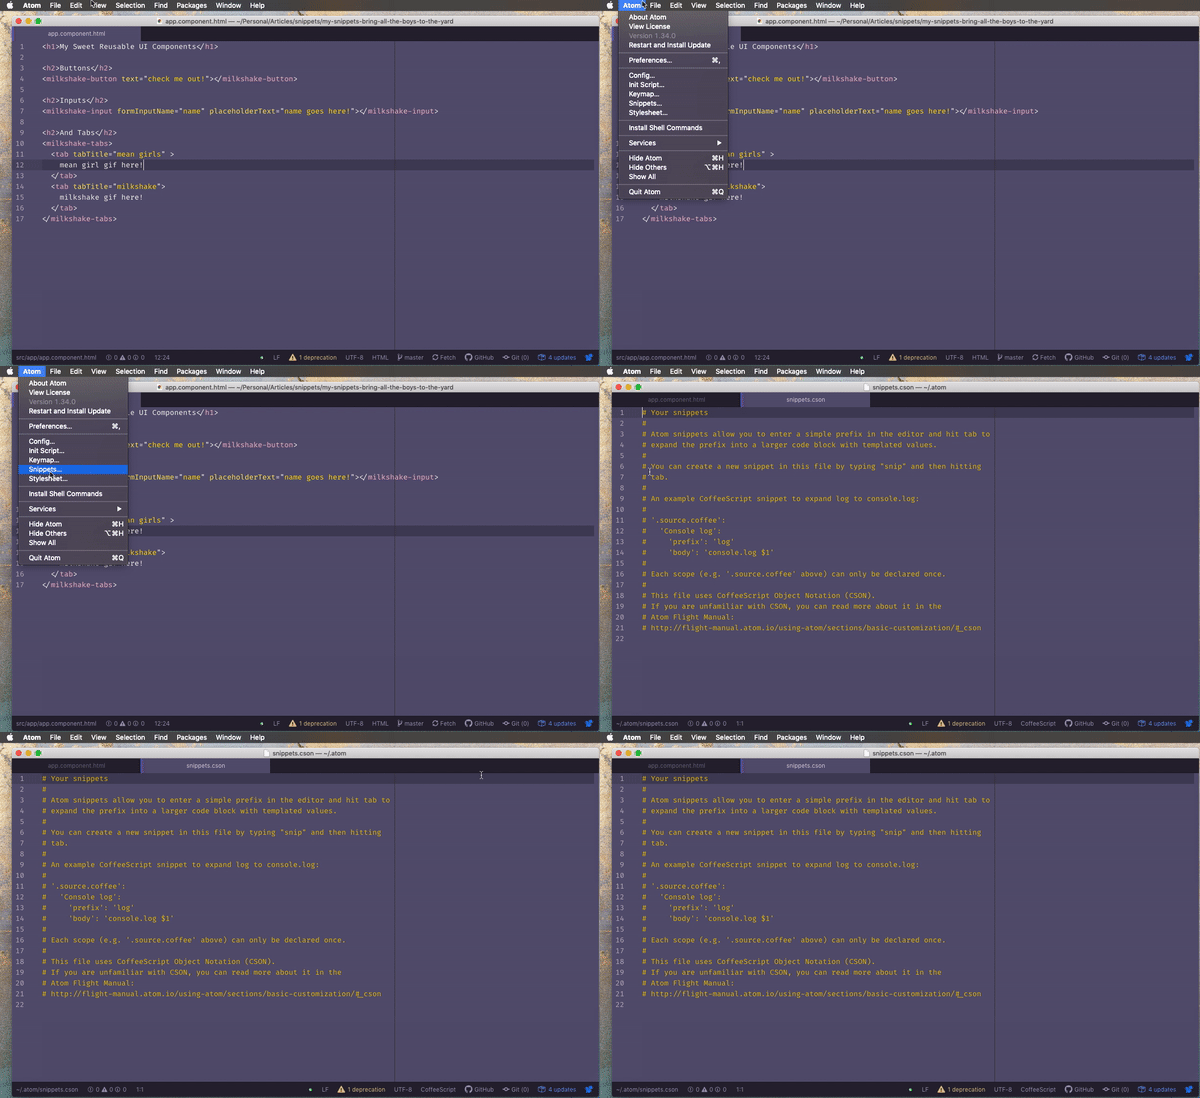
A few things to note - snippets for languages must all fall under the language key, they’re not self-contained like the VS code examples. Not super in love with this. This means if I want to use this snippet in TypeScript AND JavaScript files I’l have to have two instances of it. = /
Also, get used to looking up JavaScript special characters, you’ll need to create line breaks and tabs the old-fashioned way using /n and \t OR tab your code inside quotation marks. And then there’s one final roadblock - we can’t have several snippets with the same prefix, only one will show, so we have to slightly change our prefixes. It’s not the end of the world, but certainly more annoying.
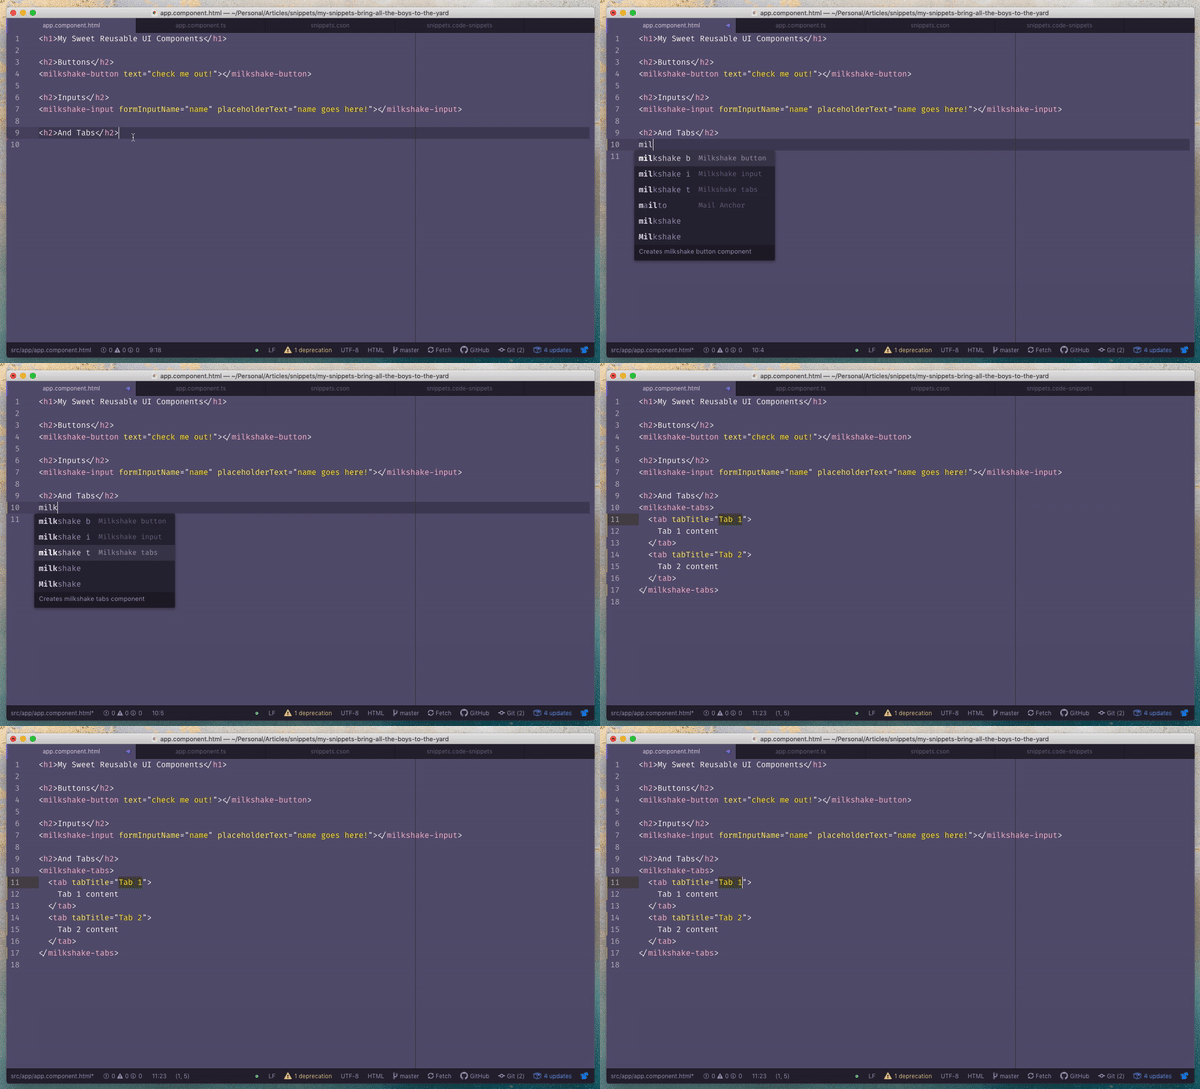
Our finalized snippet file will look like this:
".source.html":
  "Milkshake button":
    "prefix": "milkshake b"
    "body": "<milkshake-button text=\"$1\"></milkshake-button>"
    "description": "Creates milkshake button component"
  "Milkshake input":
    "prefix": "milkshake i"
    "body": "<milkshake-input formInputName=\"$1\" placeholderText=\"$2\"></milkshake-input>"
    "description": "Creates milkshake input component"
  "Milkshake tabs":
    "prefix": "milkshake t"
    'body': """
      <milkshake-tabs>
        <tab tabTitle=\"${1:Tab 1}\">
          ${2:Tab 1 content}
        </tab>
        <tab tabTitle=\"${3:Tab 2}\">
          ${4:Tab 2 content}
        </tab>
      </milkshake-tabs>
    """
    "description": "Creates milkshake tabs component"
".source.ts":
  "Milkshake sparkleClass":
    "prefix": "milkshake"
    "body": """
      this.${1:isSparkling} = true;
      setTimeout(() => {
        this.${1:isSparkling} = false;
      }, 350);
    """
    "description": "Creates milkshake isSparkle member setting & timeout"
Sharing Atom Custom Snippets with your Team
Unfortunately snippets live in a user’s root folder in the atom directory, and can’t easily be tied directly to our project. The easiest way to share these snippets will be to create and publish a package that lives in a separate git repo. You can fork my example atom-milkshake-package here to create your own.
In order to get the snippets, your team will need to clone the git repo into their ~/.atom/packages path and restart atom to get the new snippets.
cd ~/.atom/packages
git clone https://github.com/tehfedaykin/atom-milkshake-snippets
Sublime Text 3
Ahhh, the text editor of my youth, I was so reluctant to let you go, but I’ve grown and have different needs now. You’ll always have a special place in my heart, and I’ll create snippets for those you still serve.
To create your first snippet go to Tools > Developer > New Snippet. Save the snippet with the name of your snippet with the extension .sublime-snippet.
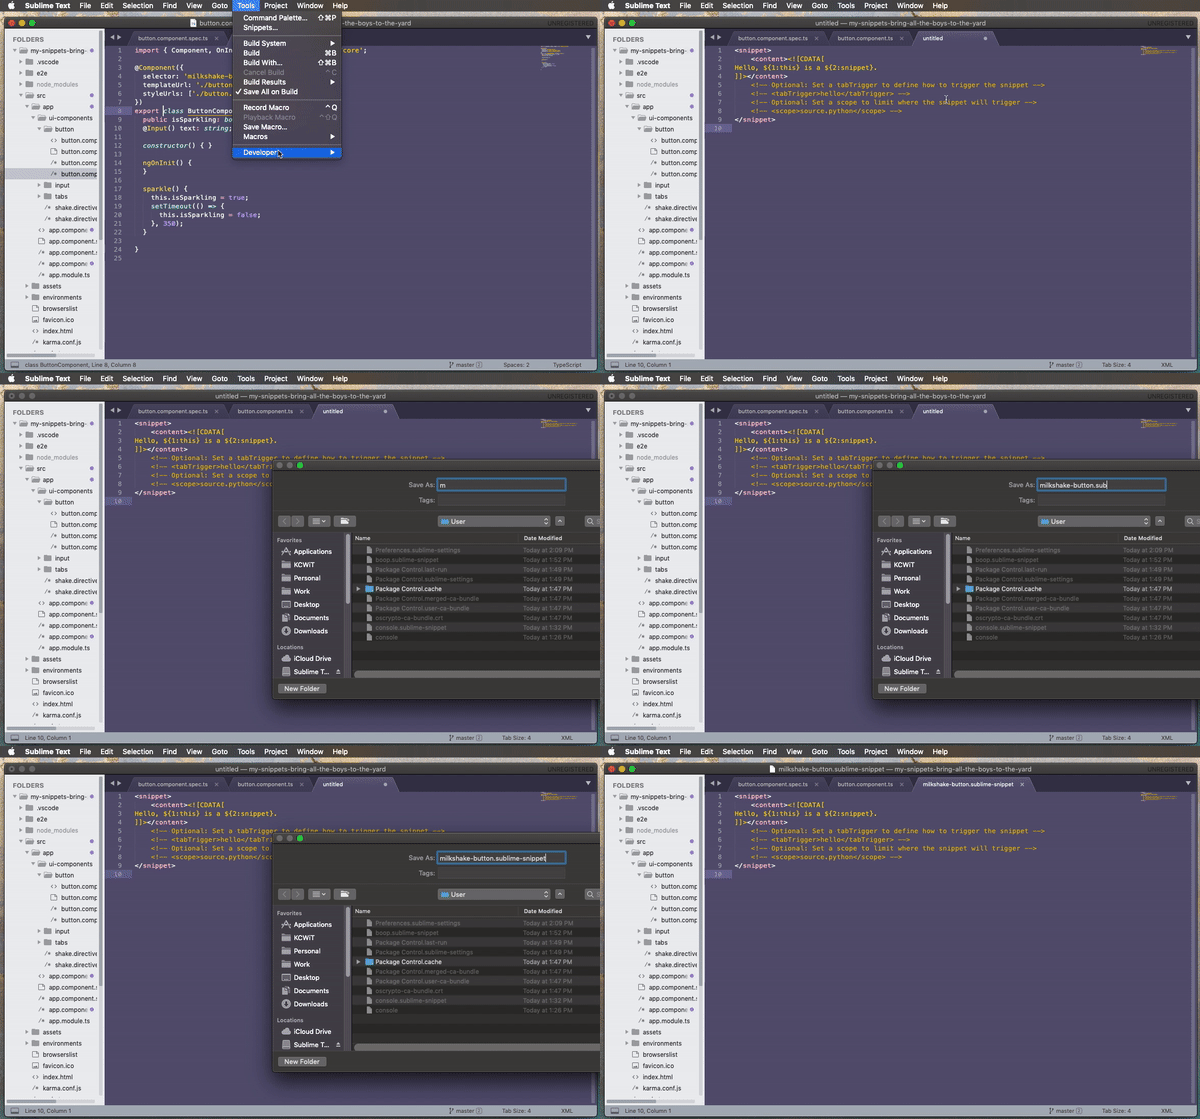
A few pro-tips if you’re like me and actually had to install Sublime Text.
- Add
"auto_complete_selector": trueto your settings file. - I could NOT get a snippet scoped as a TypeScript file to work consistently and chose to omit the scope. If you have trouble with snippets not working, comment out the scope piece first for debugging help. = )
<snippet>
	<content><![CDATA[
console.log(${1:this} is a snippet by ${2:Jennifer}.) (1) (2)
]]></content>
	<tabTrigger>console</tabTrigger> (3)
	<scope>source.ts</scope> (4)
	<description>Create a console log</description> (5)
</snippet>
(1) - the code that your snippet will generate (2) - wooo tabspots (3) - what you need to type to be able to select your snippet (4) - what file types you want your snippet to be available in - you can specify multiple separated by commas doc (5) - snippet description
Finished Sublime Snippets
milkshake-button.sublime-snippet
<snippet>
	<content><![CDATA[
<milkshake-button text="$1"></milkshake-button>
]]></content>
	<tabTrigger>milkshake</tabTrigger>
	<scope>text.html</scope>
	<description>Creates milkshake button component</description>
</snippet>
milkshake-input.sublime-snippet
<snippet>
	<content><![CDATA[
<milkshake-input formInputName="$1" placeholderText="$2"></milkshake-input>
]]></content>
	<tabTrigger>milkshake</tabTrigger>
	<scope>text.html</scope>
	<description>Creates milkshake input component</description>
</snippet>
milkshake-tabs.sublime-snippet
<snippet>
	<content><![CDATA[
<milkshake-tabs>
	<tab tabTitle="${1:Tab 1}">
	  ${2:Tab 1 content}
	</tab>
	<tab tabTitle="${3:Tab 2}">
	  ${4:Tab 2 content}
	</tab>
</milkshake-tabs>
]]></content>
	<tabTrigger>milkshake</tabTrigger>
	<scope>text.html</scope>
	<description>Creates milkshake tab component</description>
</snippet>
milkshake-sparkleclass.sublime-snippet
<snippet>
<content><![CDATA[
this.${1:isSparkling} = true;
setTimeout(() => {
this.${1:isSparkling} = false;
}, 350);
]]></content>
<tabTrigger>milkshake</tabTrigger>
<description>Creates milkshake isSparkle member setting & timeout</description>
</snippet>Sharing Sublime Custom Snippets with your Team
We’ll take a similar approach to sharing Sublime snippets that we took with Atom snippets - creating a github repo that new team members can clone into their Sublime packages Directory. (you can also put all your snippets in a single repo if that’s your jam, too.)
cd "/Users/{{yourusername}}/Library/Application Support/Sublime Text 3/Packages"
git clone https://github.com/tehfedaykin/sublime-milkshake-snippets.git
If this doesn’t match your local sublime path, you can hit command shift p and search for ‘browse packages’.
Dreamweaver
Now, let’s look at creating snippets for Dreamw…hahahaha just kidding. #sorrynotsorry
Summary
Now, go forth and create custom snippets to improve workflow and bring all the developers to you yard! I taught you, but didn’t have to charge!
ps. if you didn’t get my jokes and the theme of this app, here’s the song:
